How Does a Red Dot Sight Work
A red dot sight is a widely used aiming device that enhances accuracy and speed for shooters in various applications, including firearms and archery. At its core, a red dot sight consists of a few essential components: an LED light source, a reflective lens, and an adjustable mounting system. The LED projects a bright red dot onto the lens, which reflects the dot back toward the shooter while allowing ambient light to pass through. This design enables shooters to maintain a clear view of their target while aligning the dot for precise aiming.
One of the standout features of red dot sights is their parallax-free design. Most models are calibrated to be parallax-free at a specific distance, often around 50 yards. This means that, within that range, the dot will remain on target regardless of the shooter's eye position. As a result, shooters can focus on the target without needing to perfectly align their eye with the sight. This feature is particularly beneficial in dynamic shooting situations where rapid target acquisition is crucial.
In addition to parallax-free functionality, many red dot sights come with adjustable brightness settings. This allows users to tailor the visibility of the dot depending on the surrounding lighting conditions. For instance, a brighter dot might be necessary in bright sunlight, while a dimmer setting could be more effective in low-light environments. This adaptability makes red dot sights versatile tools for a variety of shooting scenarios.

How do you Zero A Red Dot Sight
Zeroing a red dot sight is an essential process that ensures your point of aim aligns with your point of impact. This alignment is crucial for effective shooting, whether you're using the sight for competitive shooting, hunting, or tactical applications. Here’s a comprehensive guide on how to properly zero your red dot sight.
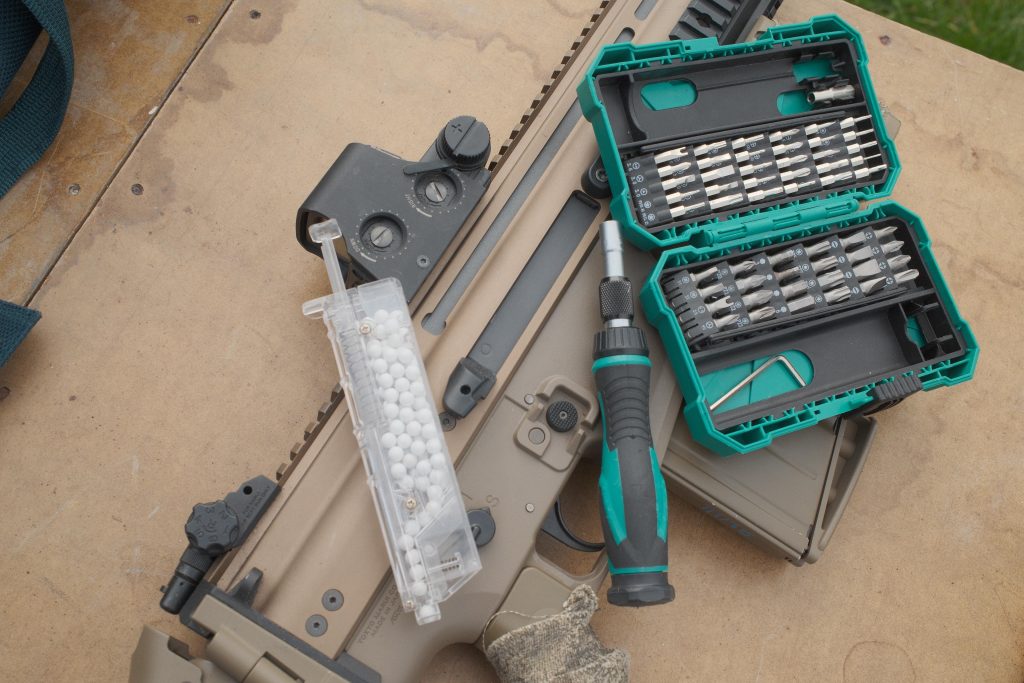
Step 1: Gather Your Equipment
Before you begin, it's important to gather all the necessary equipment to facilitate the zeroing process. You will need your airsoft gun with the red dot sight securely mounted, a stable shooting rest or bench to ensure accuracy, target paper or a suitable target, and the appropriate weight bbs. Additionally, have any tools for adjusting the sight handy; these are typically included with the sight when you purchase it, but a simple flathead screwdriver or even a small coin will do. Having everything prepared in advance will streamline the process and reduce any potential distractions.
Step 2: Choose the Right Distance
Selecting an appropriate distance for zeroing is crucial. Common distances include 10, 25, or 50 meters, depending on your intended shooting application. For most users, starting at 20 meters is often recommended. This distance allows for easier adjustments and is a good baseline for many red dot sights. If you plan to use the sight at longer ranges, you can later confirm your zero at those distances.
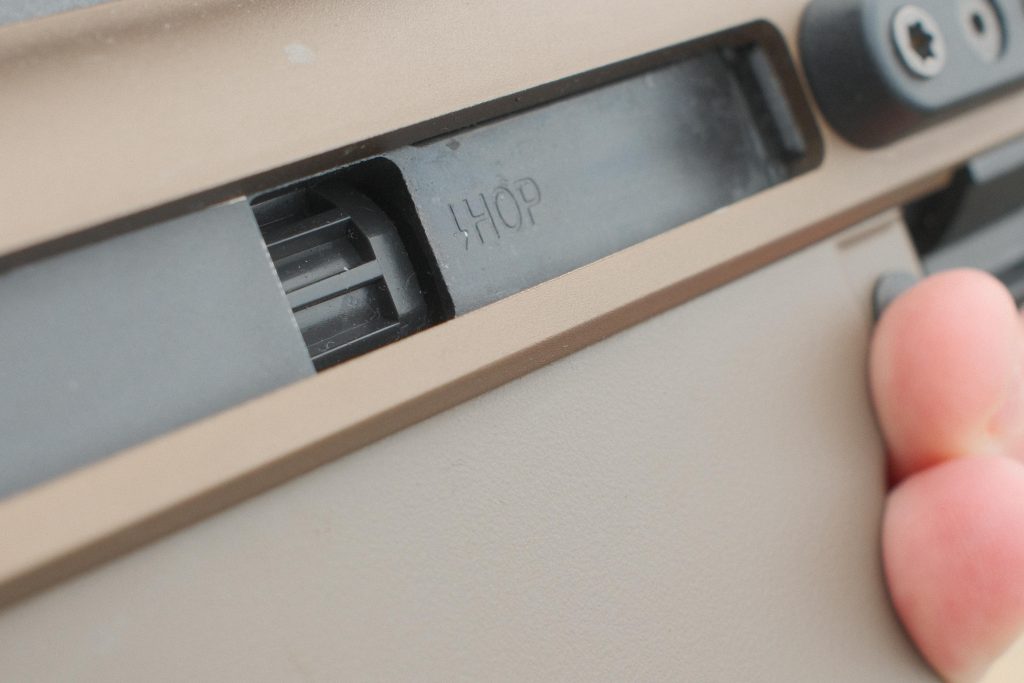
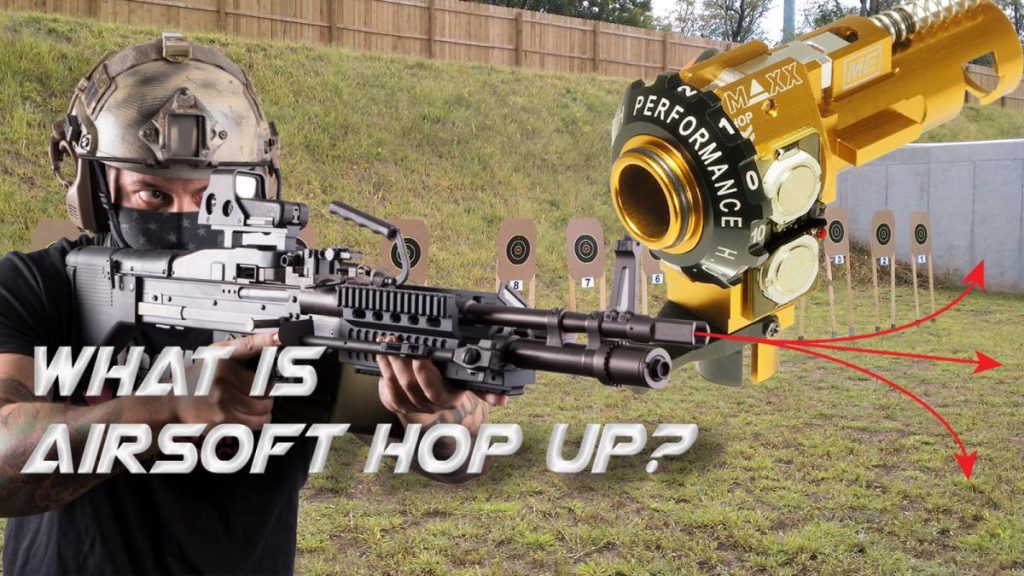
Step 3: Set Your Hop-Up
Before you start shooting, it's essential to set your hop-up. The hop-up system is crucial for ensuring your BBs fly straight and accurately toward the target. Adjust the hop-up to achieve a consistent backspin on the BBs, which helps stabilize their flight path. You want your bbs to be shooting straight all the way to your target. During the zeroing process, be prepared to readjust the hop-up if necessary to ensure your shots are as accurate as possible. Proper hop-up adjustments will contribute significantly to achieving a successful zero.
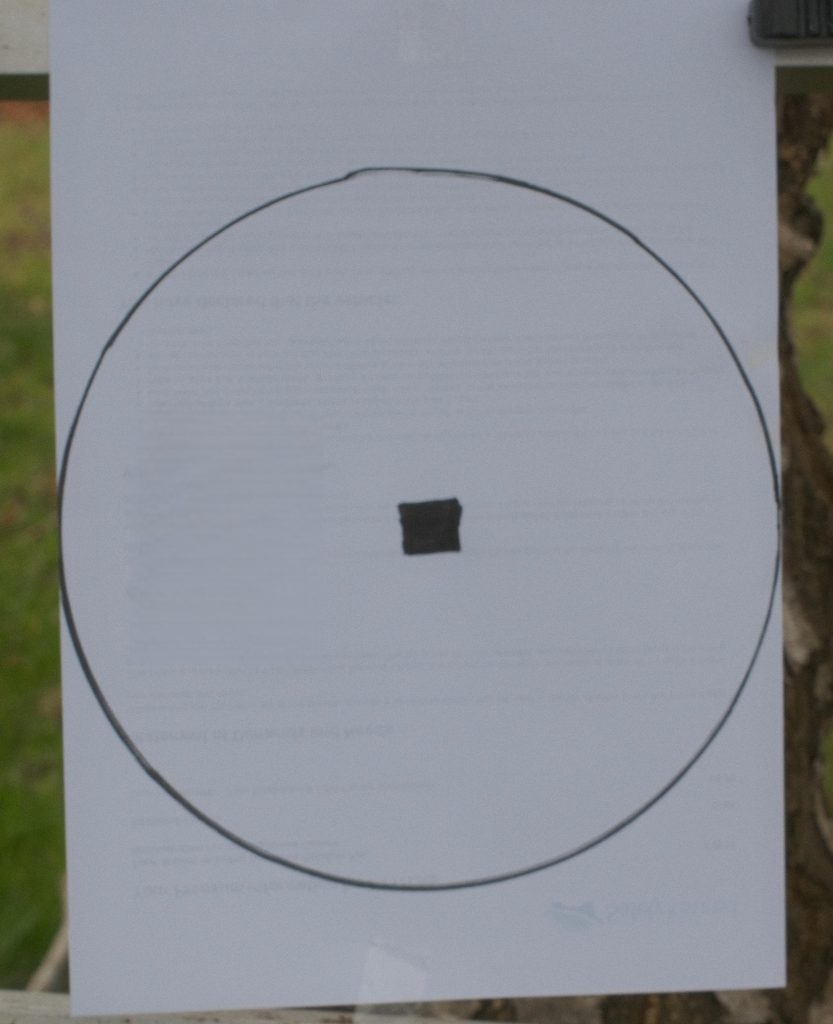
Step 4: Set Up Your Target
Once you've chosen a distance, set up your target. Ensure that it is clearly visible and that you have a safe backdrop to capture any stray shots. If using a paper target, aim for a distinct point, such as a bullseye, which will serve as a clear aiming reference. Proper target placement is vital, as it directly impacts your ability to assess the accuracy of your shots.
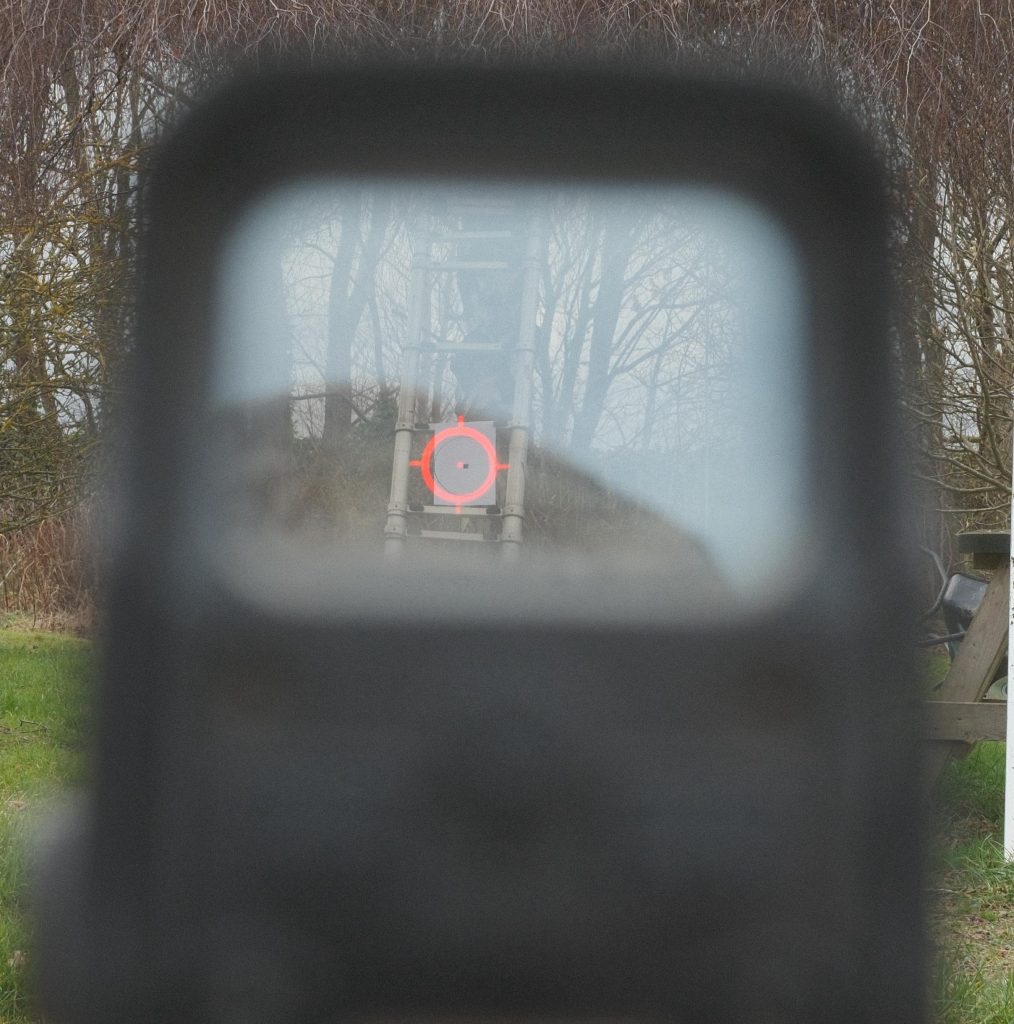
Step 5: Fire a Group
From a stable position, fire a group of three to five shots at the target, aiming for the center. This initial grouping will give you a baseline for where your shots are landing in relation to your aim. Use a consistent shooting technique with about 1 second per shot to minimize variables. Factors like grip, stance, and breathing can all affect your accuracy, so focus on maintaining a steady hold throughout the process.
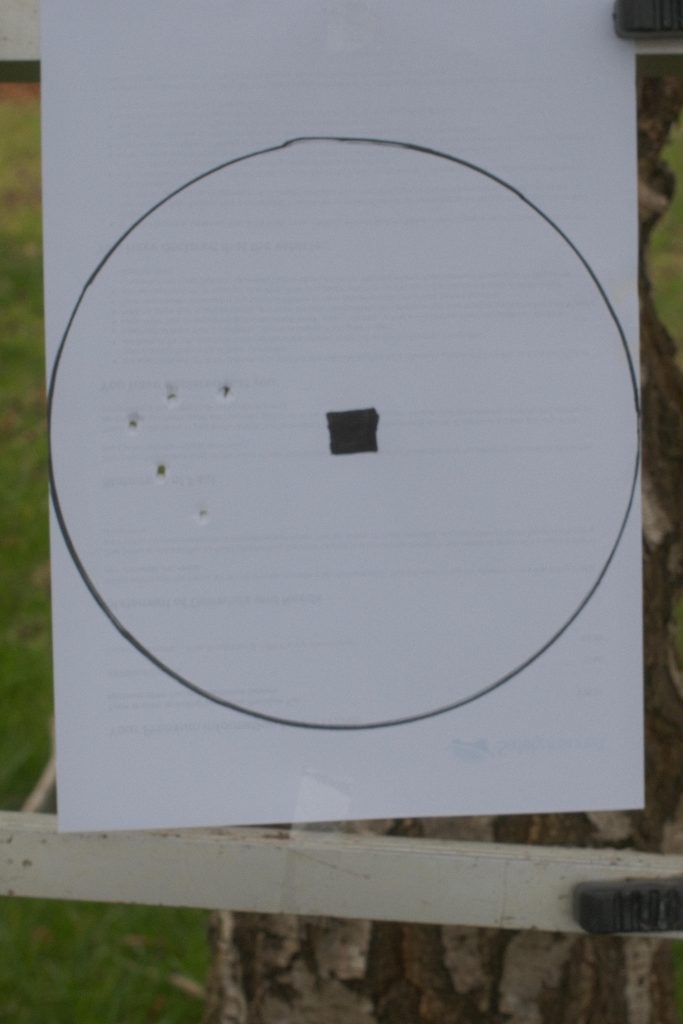
Step 6: Analyze Your Shots
After firing your group, carefully examine where the shots landed in relation to your point of aim. Take note of the pattern of your shots: Are they grouped tightly together? Are they consistently high, low, left, or right of the target? This analysis will help you determine the necessary adjustments to bring your point of impact in line with your point of aim.
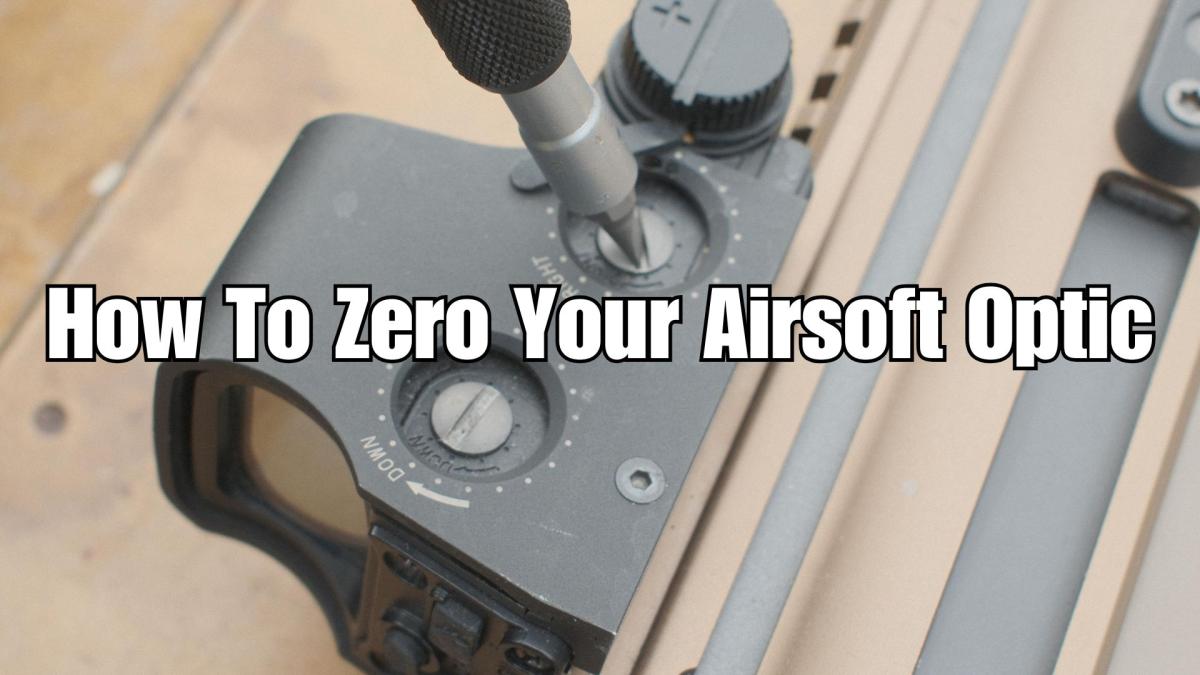
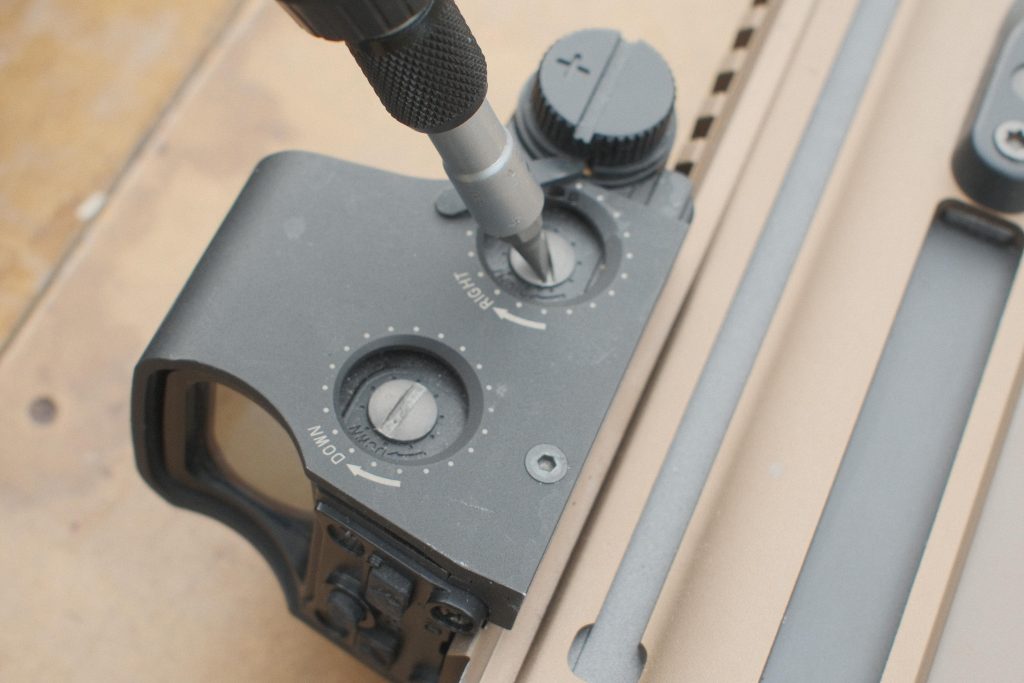
Step 7: Make Adjustments
Using the adjustment knobs on your red dot sight, make the necessary corrections based on your analysis. If your shots are hitting high or low, adjust the elevation knob accordingly. Typically, turning the knob in one direction will raise the point of impact, while turning it in the opposite direction will lower it. For shots that are off to the left or right, use the windage adjustment knob to correct the alignment. Understanding how these adjustments work is critical for effective zeroing.
Step 8: Fire Another Group
After making the necessary adjustments, fire another group of shots at the target. Assess the new point of impact in relation to your point of aim again. It may take several iterations of firing and adjusting to achieve the desired alignment. Be patient and methodical in this process, as rushing can lead to inaccurate zeroing.
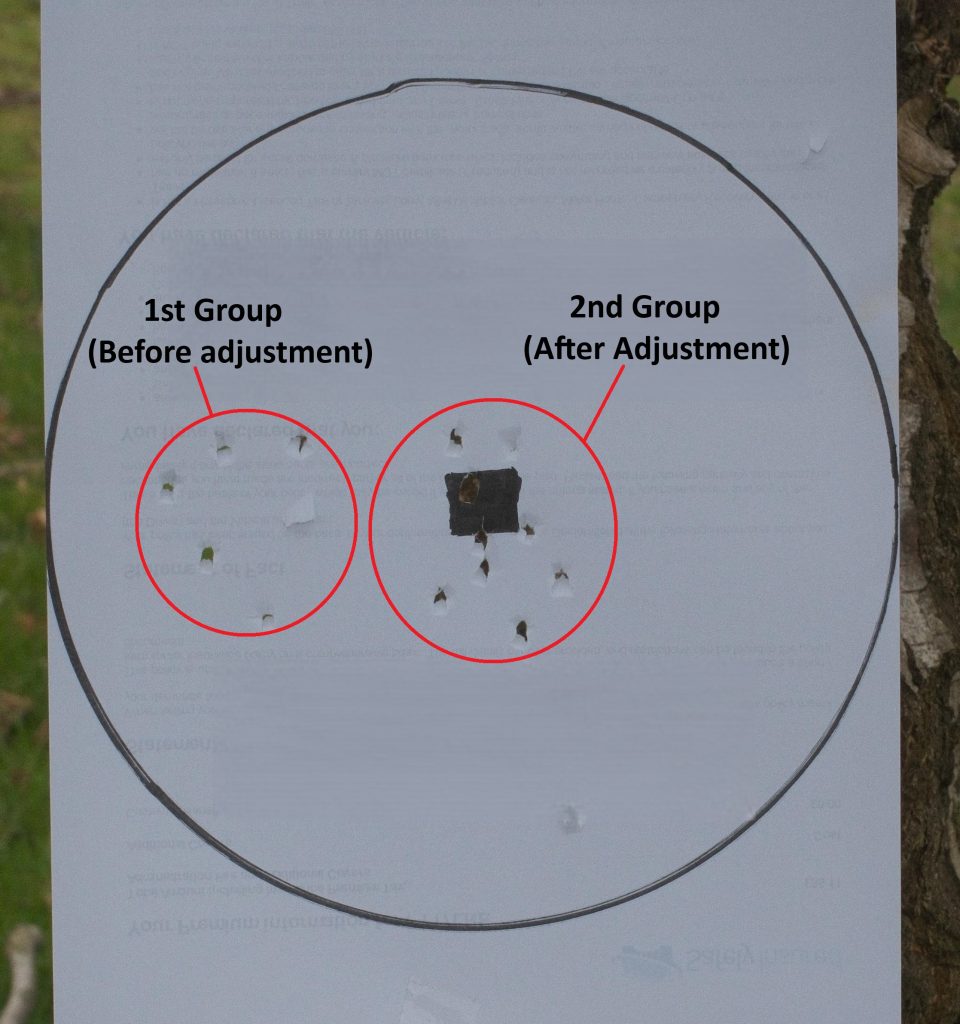
Step 9: Confirm Zero
Once you feel confident with the adjustments, fire several more shots to confirm that your red dot sight is properly zeroed. Consistency is key; ensure that your shots are hitting where you aim over multiple rounds. This step helps to verify that your adjustments have taken effect and that the sight holds zero, providing you with confidence in your shooting.
Step 10: Final Check
After confirming your zero, it's prudent to document the zero distance and any specific settings, such as brightness levels. This record will be helpful for future reference, especially if you need to re-zero the sight or if you change ammunition types. Regularly checking your zero is also advisable, particularly if your sight has been bumped or if you’ve made adjustments to your equipment.
Step 11: Shot Groupings & Upgrades
You may find that your groupings (the distance between each impact) might be quite far apart in some cases. this could be due to several factors, the first being how far you are from the target. the further away you are the longer the bb has to travel and can be affected by wind or other environmental factors. The second reason for wide shot grouping could be the power output of the airsoft gun and its hop up and bucking. The more powerful your gun shoots FPS and joule wise the further it can theoretically travel with less effect from the wind. A good inner barrel and hop up/ hop up bucking can help give the bb more backspin and be more consistent and accurate.
The third thing to consider is bb weight, the heavier the bb the less resistance it has from the wind, and the lighter the bb weight the more it can be affected by the wind. However, if you shoot 350 FPS on a 0.20-gram bb then you will shoot about 300 ish FPS on a 0.28-gram bb due to the heavier bb needing more power behind it to shoot, this means that the heavier bb will travel slower compared to the lighter bb. So setting up or upgrading your rifle to shoot at your preferred bb weight is advised to obtain the best accuracy possible.
The very last thing to keep in mind is that these are TOY replicas you will rarely be pinpoint accurate unless your engagement distance is within the 10-meter range or you invest heavily on upgrades for your airsoft replica. the spread of rounds from our airsoft guns can be inconsistent even on the best airsoft guns, so keep in mind what your perfect range is for your airsoft gun and if in doubt just full auto.
Do you Need Iron Sights With A Red Dot
The question of whether you need iron sights in conjunction with a red dot sight is a topic that generates considerable discussion among shooting enthusiasts and professionals alike. The integration of both sighting systems can offer various advantages, but the necessity of having iron sights alongside a red dot sight often depends on individual preferences, shooting circumstances, and intended applications. Below are several key considerations that can help clarify this important topic.
Backup Option
One of the most compelling reasons for maintaining iron sights on your firearm when using a red dot sight is the aspect of redundancy. While red dot sights are generally reliable and offer excellent target acquisition speed, they are not infallible. Potential issues such as battery failure, electronic malfunctions, or physical damage to the sight can render them ineffective at critical moments. In such scenarios, having a set of iron sights serves as a practical backup aiming solution. This redundancy ensures that you remain capable of engaging targets effectively even if your primary sighting system fails, thereby enhancing your overall preparedness.
Co-Witnessing
Another noteworthy consideration is the concept of “co-witnessing,” which involves aligning the iron sights and the red dot sight on the same plane. This setup allows shooters to utilize the iron sights through the red dot sight without needing to adjust their head position significantly. Co-witnessing can be particularly advantageous in high-pressure situations where quick target acquisition is crucial. By enabling a seamless transition between the two sighting systems, co-witnessing enhances a shooter's ability to adapt to varying circumstances, thereby increasing shooting efficiency and effectiveness.

When Were Red Dot Sights Invented
Red dot sights have a relatively modern history in the world of optics and firearms. The concept of a non-magnifying sight that projects a dot onto a lens can be traced back to the 1970s.
Early Development
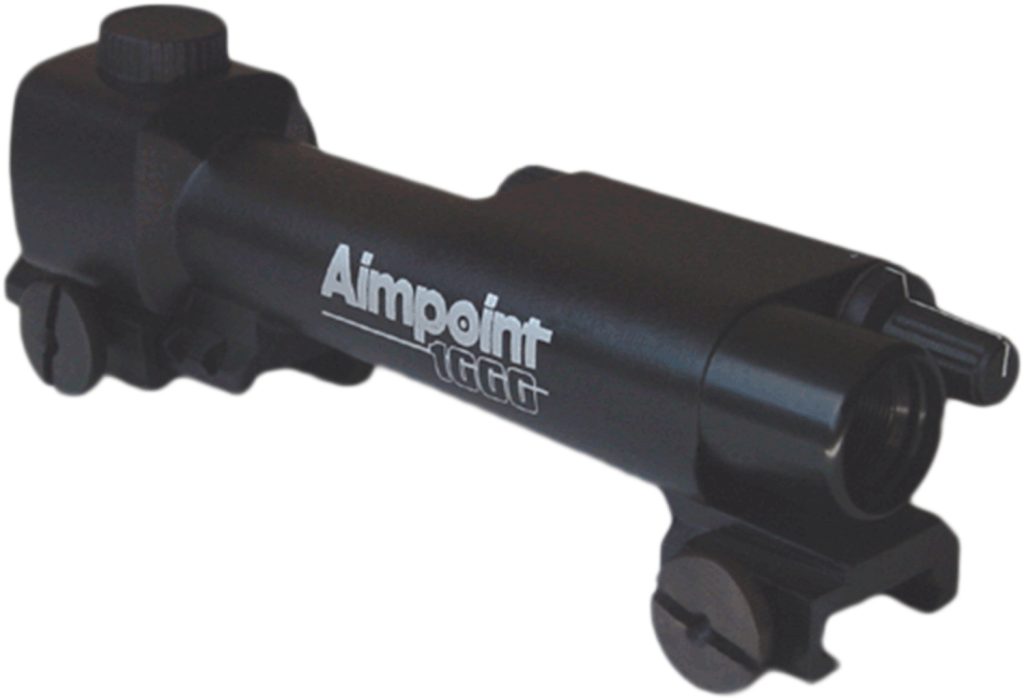
The first red dot sight was developed by the American company Aimpoint in 1975. Aimpoint introduced the first commercially successful reflex sight, known as the Aimpoint 1000. This sight utilized an LED to project a red dot onto a lens, allowing shooters to quickly acquire targets while maintaining peripheral awareness. This innovation marked a significant advancement in sighting technology, moving away from traditional iron sights.
Advancements and Popularization
Throughout the late 1980s and into the 1990s, red dot sights began to gain popularity among military and law enforcement agencies. Their ability to enable quick target acquisition made them especially appealing for dynamic shooting situations. The U.S. military started adopting red dot sights for certain firearms, and various manufacturers began producing their own versions, leading to a broader acceptance of the technology.
Modern Era
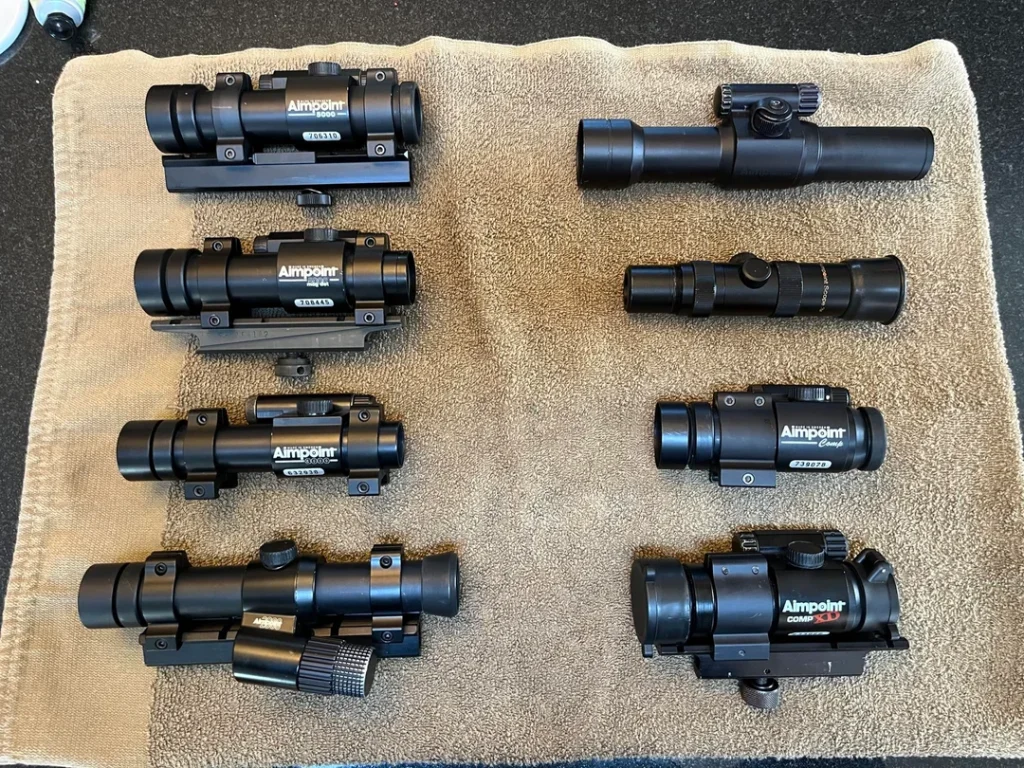
By the 2000s and 2010s, red dot sights had become widely available to civilian shooters, hunters, and competitive marksmen. Advances in technology, such as improved battery life, and durability, and the introduction of features like adjustable brightness settings, further enhanced their appeal. Today, red dot sights are a staple in the shooting community, used in everything from tactical applications to recreational shooting.
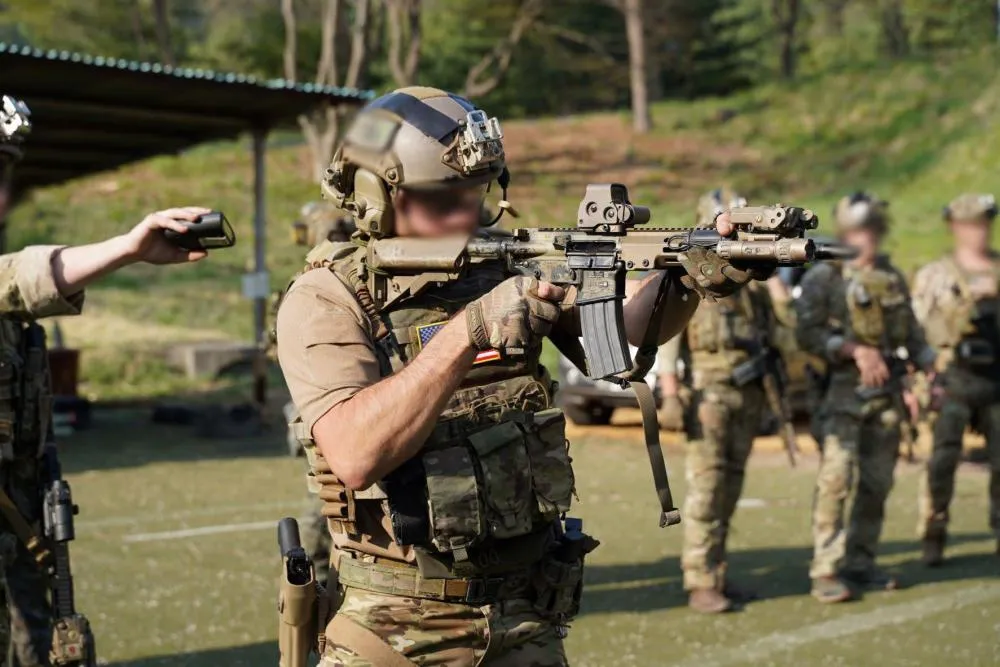
What Red Dot Sight Does the Military Use
The type of red dot sight used by military forces can vary significantly depending on the country and the specific branch of the military. Each military may have different preferences based on their operational needs, missions, and the environments in which they operate. Here’s an overview of some of the commonly used optics among various military forces.
United States Military
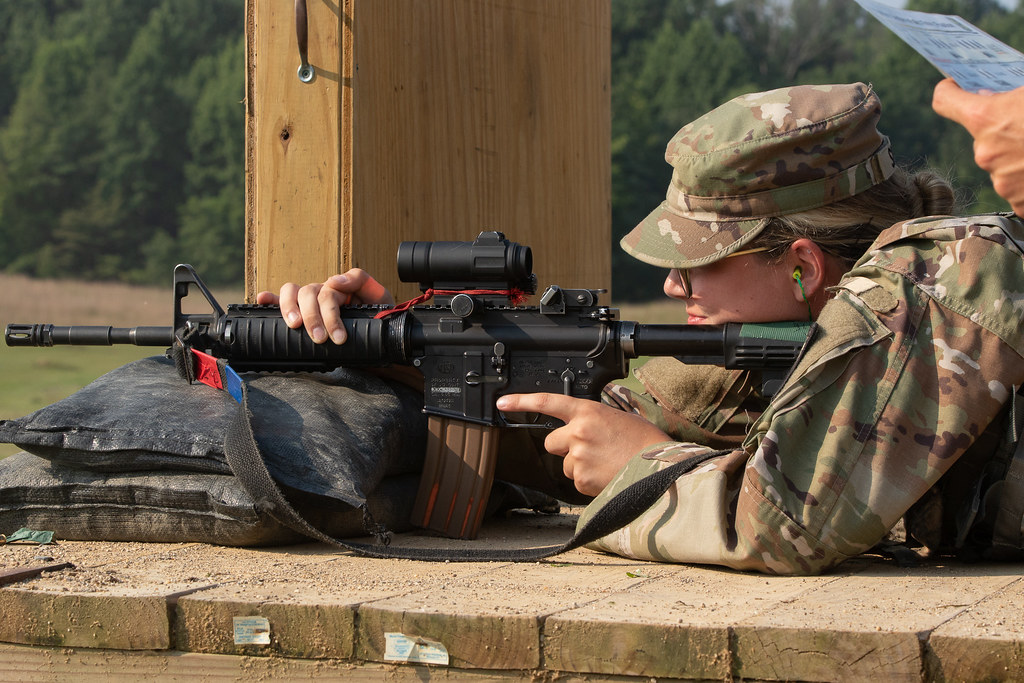
In the United States, the military predominantly employs several types of optics, including red dot sights. One of the most favored options is the Aimpoint red dot sight, particularly models like the Aimpoint CompM4. These sights are appreciated for their ruggedness, long battery life, and ease of use, making them suitable for various firearms, including rifles and shotguns.
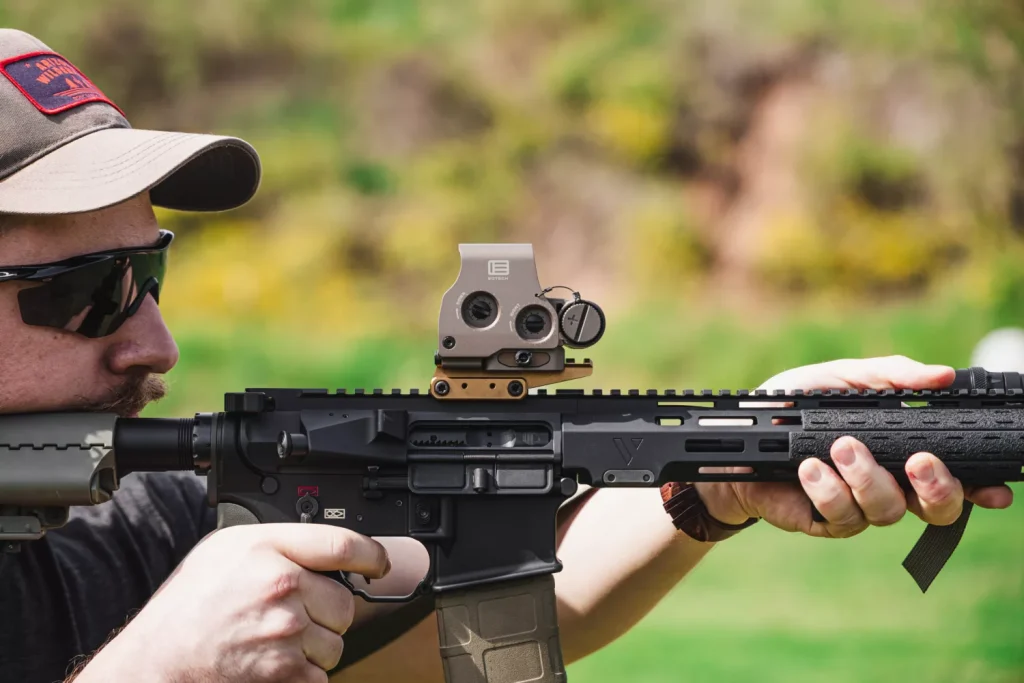
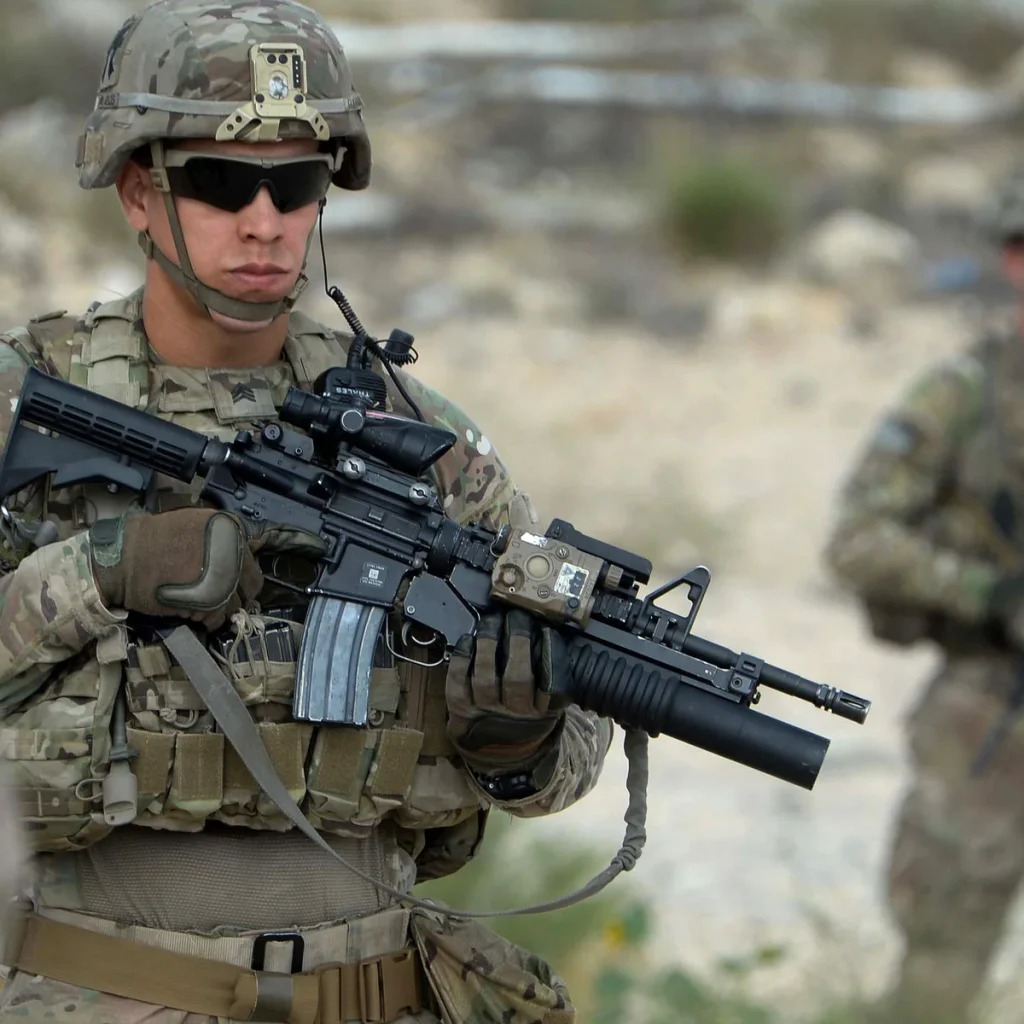
Additionally, the EOTech holographic sights are widely used, especially among special operations and tactical units. Models such as the EOTech 553 and 512 are known for their holographic reticles, which allow for rapid target acquisition and enhanced situational awareness. While these are not traditional red dot sights, they serve a similar purpose in providing quick aiming solutions.
Another important optic used by the U.S. military is the ACOG (Advanced Combat Optical Gunsight). Although it is not a red dot sight, the Trijicon ACOG is a fixed-power scope that provides magnification along with an illuminated reticle. It is commonly used in designated marksman roles and offers advantages in both targeting and accuracy at longer ranges.
Other Military Forces
Beyond the United States, other countries have adopted their own preferences for red dot sights. For example, the British Armed Forces have utilized Aimpoint and EOTech sights, as well as the Elcan Specter DR, which provides the versatility of both magnified and non-magnified views. This flexibility is beneficial in various combat scenarios.
The Canadian Forces primarily use the C79 mounted on their C7A1 and C7A2 rifles. These sights offer quick target acquisition, which is essential in close-quarters combat situations as well as long-range engagements, enhancing the effectiveness of soldiers in the field.
In summary, the choice of red dot sights and other optics used by military forces varies by country and specific military branch. While the U.S. military frequently opts for Aimpoint and EOTech sights, other nations have their own preferred optics that suit their unique operational requirements. Additionally, traditional iron sights continue to play a role, often serving as backup options or being utilized in specific contexts. The selection of sighting systems reflects the diverse needs and tactical considerations of each military force, emphasizing the importance of adaptability in modern warfare.